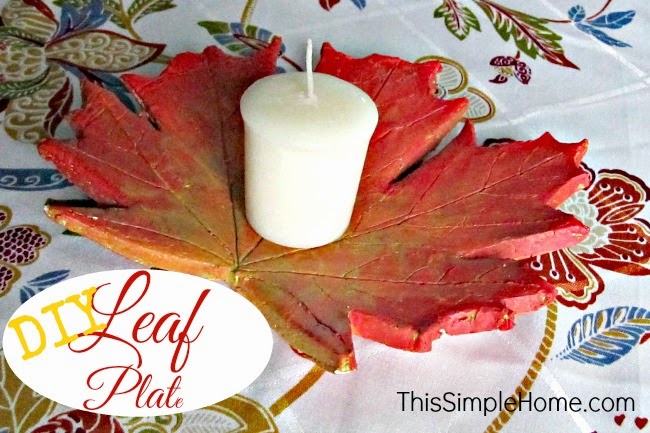
I once saw a leaf bowl designed from clay. I wanted one for myself, and I wanted to make it myself. I made this autumn leaf plate in early November. (It may be December, but I still wanted to share it.)
The Clay
First, I purchased air-dry clay from Crayola. Though I could have made salt dough (like for our keepsake ornaments), I wanted real clay; since I don't have access to a kiln, this is an excellent option for me. I chose Crayola because I trust them and my children's art teacher recommended it. Based on her recommendation, I bought just the five pound tub of the air-dry clay. I didn't want to have so much that I couldn't use it in a fairly short time. For your own reference, less than a pound of clay is needed for this large leaf plate. Also, a 2.5pound tub is about the size of a Cool Whip container.
The Leaf
I knew I wanted a really large leaf. Our own backyard only has a few trees. I kept my eye out for large, green leaves. By the time I made my leaf plate, many trees were bare. However, after taking Little Sister to her first dentist appointment, the two of us collected lots of leaves from one of the trees outside of the office.
I made the mistake of not placing the leaves in a book upon arrival home. By the time I was ready to make my leaf plate from clay, I had to soak my leaf in large bowl so they did not crumble.
How to Make a Clay Leaf Plate
Materials Needed:
Cardboard or canvas for clay (NOT wax paper)
air-dry clay
sharp knife
large leaf
rolling pin
toothpick
acrylic paint (green, red, yellow)
paint brush
water
bowl
aluminum foil
spray sealer in gloss or satin
Directions:
1. Working on a large piece of cardboard, knead a large handful of clay to remove air bubbles. Form a ball and then flatten it to a disk.
2. Roll the disk flat. It needs to be between 1/4 and 1/2 inch thick. Aim for thicker to ensure it does not break. (If I were to do it again, I would roll my clay much larger. I lost some of the beautiful leaf's points.)3. Press the leaf, back side down, on the clay. The veins on the back of the leaf are pronounced with ridges that imprint on the clay.
4. Remove the leaf. Use your sharp knife to trace the leaf. Remove the leaf. Now use the sharp knife to cut the leaf image from the clay. (If using your favorite kitchen knife wash it immediately. That was me.)
5. Use the toothpick to retrace the leaf's veins. Begin with main veins. For smaller veins, do not cut as deep into the clay.
6. Use water to smooth the edges. The clay will dry as it is. Any "crumbs" of clay or sharp edges will be more pronounced when it is dry.
7. Choose your bowl carefully. I used a shallow soup bowl to turn up the edges of my clay leaf plate slightly. To make a bowl, you will want to use a deeper bowl. Based on the size of your leaf and bowl, decide if you want to place the clay leaf on the inside or outside (upside down) of the bowl. Wrap in aluminum foil to protect the bowl.
8. Allow the leaf to thoroughly dry according to manufacturer's instructions. I allowed a couple extra days just to be sure.
9. Paint the leaf, including all of the crevices, as desired*. Don't forget to paint the back. Allow to dry completely. (Acrylic paint stains so use care and protect your surfaces and yourself.)
10. Seal with your spray sealer outdoors. (Mod Podge could be used as well.)
*I began painting my leaf a greenish-yellow. Next I added orange and then a reddish-orange. Lastly, I added red. The edges of my leaf or red, while the inside is lighter in color.
What do you think? It can be used for a votive candle or jewelry. I like it.
I have lots of clay left over. What projects do you suggest for the children or me? Big Sister already made candle holders. I had her design them on paper before creating them. We had to compromise on how elaborate they would be. It was fun for her.
Disclosure: This post contains affiliate links. If you make a purchase through an affiliate link, I earn a small percentage at no cost to you. Thank you!
~ Annette
Sign up for weekly or daily emails from This Simple Home.


I remember making one back when I was in elementary school. My second grade teacher did all sorts of cool projects with us.
ReplyDeleteThis is beautiful! I'll be trying this with children this spring! :)
ReplyDeleteThis turned out gorgeous, Annette! What a fun project that turns out something both useful and beautiful--my favorite kind.
ReplyDeleteWOW what a talent you have! I too love leaves...you don't such a great job!
ReplyDeleteOh wow! This is REALLY cute and who knew it could be so simple!
ReplyDeleteAwesome project to do with the grandkids!
ReplyDeleteThat's gorgeous! I'm proud of you! :)
ReplyDeleteI definitely don't have a crafty talent. I've now tried 3 times to make hand print salt dough ornaments with the boys and have failed 3 times. I think I'm going to try this clay.
I love this and its beautiful
ReplyDeleteI am....VERY impressed!!!!
ReplyDelete